Self-hosting Node.js with PM2 and Caddy

Introduction
My niece bakes cakes and sells them as a hobby. Her main channel for promoting her products is Instagram. As a good uncle who codes, I decided to create a website for her.
The website consists of a backend built with strapi and a frontend using Next.js. Both are Node.js applications.
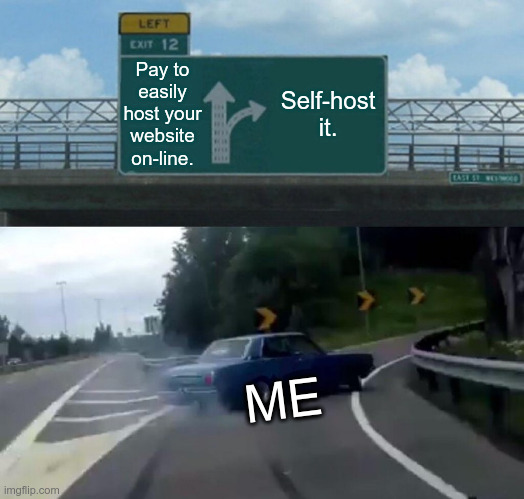
When the time came to put the website online, I was faced with the challenge of hosting. No easy solution allowed me to host the complete setup for free, and we didn’t want to pay for a hobby.
That's when Jan, my crazy Czech friend, suggested self-hosting it on my NAS.
At first, I didn't realize this was a rabbit hole...
Setup a dedicated virtual machine
Side note: in the rest of this post I use bpne as a shorthand for "Bake, Pack, N'Eat".
To physically host the solution, I set up a minimal Debian virtual machine (VM). This isolates the system running the website from the rest of the NAS.
The VM needs the following applications:
Steps
- Install debian
- Login as
root - Install some usefull tools
apt install -y curl git vim - Create the
bpneuser and grant them sudo privileges for easier management.adduser bpne adduser bpne sudo - Install node 18.12.0 LTS
curl -O https://nodejs.org/dist/v18.12.0/node-v18.12.0-linux-x64.tar.xz tar xvf node-v18.12.0-linux-x64.tar.xz mv node-v18.12.0-linux-x64 /opt ln -s /opt/node-v18.12.0-linux-x64/bin/node /usr/bin/node ln -s /opt/node-v18.12.0-linux-x64/bin/corepack /usr/bin/corepack - Install PM2
corepack yarn global add pm2 - Install Caddy server
sudo apt install -y debian-keyring debian-archive-keyring apt-transport-https curl curl -1sLf 'https://dl.cloudsmith.io/public/caddy/stable/gpg.key' | sudo gpg --dearmor -o /usr/share/keyrings/caddy-stable-archive-keyring.gpg curl -1sLf 'https://dl.cloudsmith.io/public/caddy/stable/debian.deb.txt' | sudo tee /etc/apt/sources.list.d/caddy-stable.list sudo apt update sudo apt install caddy - Log out; the rest of the work will be done with the
bpneuser.
The next step is to copy the website's code to the VM (I used Git to check out the code) and ensure everything works properly.
The PM2 process manager
Using PM2 makes it easy to manage the two Node.js applications we need.
I had to create a configuration file containing the instructions to start both of my apps: bpne-back and bpne-front.
// ecosystem.config.js
module.exports = {
    apps: [
        {
            name: 'bpne-back',
            cwd: 'back',
            script: 'server.js',
            env: {
                NODE_ENV: 'production',
            },
        },
        {
            name: 'bpne-front',
            cwd: 'front',
            script: '.output/server/index.mjs',
        },
    ],
};
To start/stop the solution use:
# Start
pm2 start ecosystem.config.js
# Stop
pm2 delete all
To check the log files:
pm2 logs bpne-back
pm2 logs bpne-front
References
Serving the websites with Caddy
With Caddy, it’s easy to serve a website with SSL. Caddy automatically handles the certificates for you.
Given the backend runs on localhost:5000 and the frontend on localhost:3000, the following configuration connects the backend
to api.somedomain.com and the frontend to somedomain.com. Requests to www.somedomain.com are redirected to somedomain.com.
Both websites use gzip compression, and in case the frontend is not reachable, we redirect to a specific maintenance page.
Everything is served through SSL.
# Caddyfile
api.{$BPNE_DOMAIN} {
    encode gzip
    reverse_proxy localhost:5000
}

www.{$BPNE_DOMAIN} {
    redir https://{$BPNE_DOMAIN}{uri}
}

{$BPNE_DOMAIN} {
    encode gzip
    reverse_proxy localhost:3000

    handle_errors {
        root * {system.wd}/front/public
        rewrite / maintenance.html
        file_server {
            status 200
        }
    }
}
To serve the websites use:
LOGFILE=$BASEDIR/bpne.log
sudo caddy start \
    --envfile path/to/the/env/file/defining/BPNE_DOMAIN \
    --config ./Caddyfile >> $LOGFILE 2>&1
To stop the server:
sudo caddy stop
References
Update the DNS records
One last issue remained: I don't have a static IP address at home, so it’s expected to change. When this happens, the DNS records will no longer be valid, and the website will go down.
Fortunatelly my registrar Gandi, provides an API to manage DNS records. We can create a script to update the records and schedule it to run with a cron job.
#!/bin/bash
# File: update_dyndns.sh
# This script gets the external IP of your systems then connects to the Gandi
# LiveDNS API and updates your dns record with the IP.

#set -x

# Gandi LiveDNS API KEY
API_KEY="xxxxxx"

# Domain hosted with Gandi
DOMAIN="somedomain.com"

# Subdomain to update DNS
SUBDOMAIN="@"

# Get external IP address
EXT_IP=$(curl -s ifconfig.me)

#Get the current Zone for the provided domain
CURRENT_ZONE_HREF=$(curl -s -H "Authorization: Bearer $API_KEY" https://dns.api.gandi.net/api/v5/domains/$DOMAIN | jq -r '.zone_records_href')

# Update the A Record of the subdomain using PUT
curl -D- -X PUT -H "Content-Type: application/json" \
        -H "Authorization: Bearer $API_KEY" \
        -d "{\"rrset_name\": \"$SUBDOMAIN\",
             \"rrset_type\": \"A\",
             \"rrset_ttl\": 1200,
             \"rrset_values\": [\"$EXT_IP\"]}" \
        $CURRENT_ZONE_HREF/$SUBDOMAIN/A
To automatically update the DNS every 30 minutes, execute sudo crontab -e and add:
*/30 * * * * /bin/bash /home/bpne/update_dyndns.sh
References
Conclusion
Between researching online hosting solutions and setting up hosting on my NAS, it took me longer to figure it all out than to write the site code.
However, along the way, I learned a lot. And as the song goes: ”Non, je ne regrette rien”...